

Renovating a bathroom can be a rewarding but complex project. When improving the shower area, it's important to choose the right tiles and understand the installation process. In this comprehensive guide, we'll delve into the nuances of tiling a shower enclosure, exploring popular tile ideas, addressing the crucial decision of tiling before or after fitting the enclosure, calculating the required tile quantity, and discussing the possibility of installing a new enclosure over existing tiles.
Do I Tile Before Fitting The Shower Enclosure?
The decision of when to install the tiles in relation to the shower enclosure installation is crucial and depends on various factors. We'll explore the pros and cons of tiling before or after fitting the enclosure.
Tiling Timing - Before Or After?
Before Fitting: Achieve a seamless look with tiles extending to the enclosure edges. This method demands precise measurements and meticulous planning to ensure a perfect fit.
After Fitting: Opt for flexibility during enclosure installation, allowing for adjustments if needed. However, finishing techniques around the enclosure edges may be necessary.
Concise Guide To Tiling A Shower Enclosure
Tiling Order In Bathroom Installation
- Run Pipework: Channel pipes to the shower valve as needed.
- Prepare Walls: Ready walls for tiling.
- Fit Shower Tray: Install the tray, connect the waste, and test.
- Tanking (Waterproofing): Tank the area, ensuring a watertight seal.
- Tile & Grout: Apply adhesive, tile, and grout the walls.
- Silicon Seal: Apply silicone seals as required.
- Fit Shower Valve & Glass Enclosure: Install the shower valve and glass enclosure.
Pro Tips
- Quicker Approach: Simultaneous tiling and plastering save time.
- Better Tile Adhesion: Bare plasterboard accommodates a broader range of tiles.
- Tile Adhesive Application: Apply slow-setting adhesive with a notched trowel.
- Back Buttering Tiles: Ensure 100% coverage by back buttering tiles.
- Tiling Off the Shower Tray: Utilise the level tray for a seamless tile layout.
- Avoiding Lipping: Prevent lipping at tile edges using spacers.
- Insufficient Adhesive Coverage: Check coverage periodically for a solid bed.
- Fitting Mosaic Tiles: Use mosaic mesh for rigidity and easier grouting.
- Levelling Border Tiles: Level border tiles off the wall tiles below.
- Tiling a Manageable Area: Spread adhesive only where tiles are immediately applied.
- Fully Tiled Enclosure: Tile walls, cut holes as needed, and let adhesive dry.
- Completed Enclosure: Grout with flexible, water-resistant grout.
Additional Information
- Adhesive Choice: Prefer cement-based, polymer-modified flexible adhesive.
- Avoid Tubbed Adhesives: Dispersion adhesives may not suit impermeable surfaces.
- Epoxy Adhesives: Generally unnecessary for domestic use.
- Finishing Touches: Use water-resistant flexible grout and colour-coordinated silicone sealant.
How Much To Tile A Shower Enclosure
Understanding the quantity of tiles required is essential for budgeting and planning. Learn how to calculate the number of tiles needed, considering wall measurements, cut tiles, and design patterns.
Calculating Tile Quantity
- Measure the Walls: Accurately measure the height and width of each wall to be tiled, multiplying these dimensions to find the square footage.
- Consider Cut Tiles: If your design involves cut tiles or intricate patterns, add extra tiles to account for potential waste.
- Tile Quantity Formula: Square footage + Waste factor = Total tiles needed.
Install Shower Enclosure Over Tile
In certain scenarios, installing a new shower enclosure over existing tiles can be a practical solution. This section explores the considerations and steps involved in this alternative approach.
Installing Over Existing Tiles
- Evaluate Existing Tiles: Ensure the condition of the current tiles is sound, with no signs of water damage or instability.
- Clean and Prepare: Thoroughly clean and roughen the existing tile surface to create an optimal bonding environment for the new enclosure.
- Use Compatible Adhesives: Select adhesives compatible with both the existing tiles and the materials of the new shower enclosure.
Shower Enclosure Tile Ideas
Starting a tiling project involves finding inspiration and selecting tiles that greatly impact the look of your shower. Let's explore various tile ideas to help you create a bathroom oasis.
Popular Shower Enclosure Tile Ideas
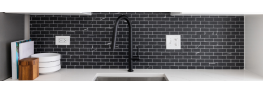
Subway Tiles: Classic and versatile, subway tiles can be arranged in various patterns, providing a timeless backdrop for your shower.

Mosaic Tiles: Express your creativity with mosaic tiles, crafting intricate designs or focal points within the enclosure.

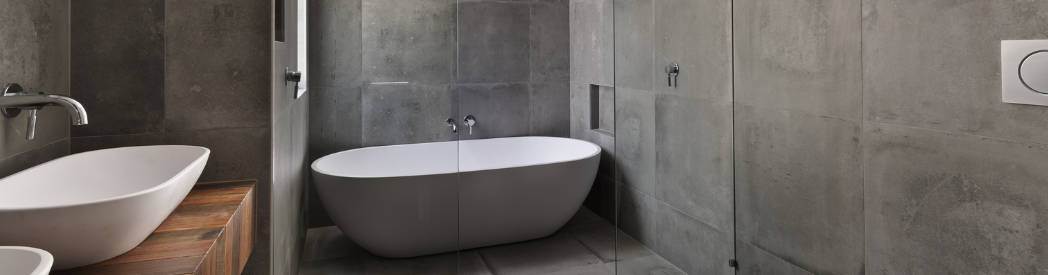
Natural Stone: Elevate the luxury factor with natural stone tiles like marble or travertine, adding sophistication to your shower space.

Large-Format Tiles: Achieve a modern and sleek appearance by opting for large-format tiles, reducing grout lines and facilitating easy maintenance.

Patterned Tiles: Infuse personality with patterned tiles, whether geometric, floral, or Moroccan-inspired, to make a bold statement.

Tiling a shower is a fun project that requires creativity, accuracy, and practical thinking. By exploring diverse tile ideas, understanding the timing of tiling in relation to the enclosure installation, calculating the required tile quantity, and considering alternative approaches like installing over existing tiles, you're well-equipped to transform your bathroom into a personalised and stylish haven. Happy tiling!