


One of the easiest ways to update your bathroom, without ripping anything significant out, is by replacing your taps. It’s incredible how much of a notable difference new taps can actually make.
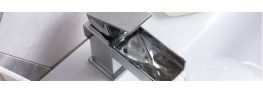
Each tap brings something new to a bathroom. Choose between a luxurious waterfall tap or a practical mono mixer tap. Once you know the process, they’re very easy to replace.
What Tools Do You Need For Replacing A Tap
- Basin Wrench
- Cranked Spanner
- Mallet
Replacing A Basin Tap
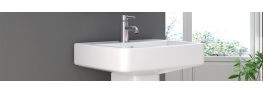
Basins tend to come with pre-drilled tap holes, which ultimately restricts which type of tap you can install. If the basin has a single tap hole, you cannot install two taps, and vice versa.
How To Replace A Tap On A Basin With A Single Tap Hole
Replacing a single hole basin mixer tap is easier than you probably think! Follow our step-by-step instructions for DIY installation below. 1.
- Before you start, don’t forget to isolate the water supply. To test this, turn the existing tap on and then turn the isolation valve (this should be behind the pedestal). If you do not have an isolation valve, turn your whole water supply off for the duration of the installation.
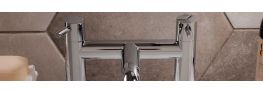
- Reach up and under the basin to unscrew the holding nuts of the existing tap. You will need the basin wrench to remove the connector nuts (these hold the taps to the water pipes). Use the cranked spanner to remove the back nuts (which secure the taps to the basin).
- Lift out the old tap. If it does not lift out easily it may be secured with silicon or another kind of putty. Gently tap the bottom of the tap with a mallet until they are loose.
- Make sure the tap hole is clear of any silicon or putty before placing your new tap
- Put the new tap into the hole and secure it with the provided washers and mounting nuts.
- Reattach the existing supply pipes or use a flexible tap connector. Turn your isolation valve or water supply back on. Carefully turn the new tap on and check for leaks.
- If there are no leaks, be sure to give the tap a clean and you're done!
How To Replace Two Hole Basin Taps
Once you understand how to replace a single basin tap, replacing two for example with pillar taps, will be just as easy!
Simply, repeat steps 1-7 on both the left and the right tap, and hey presto!
Replacing A Bath Tap
Baths, unlike basins, generally do not come with any tap holes. So, each person can choose their bath and taps without being restricted to a specific type of tap.
Read our instructions below for installing bath taps.
- Make sure to isolate your water supply before you start the project. Turn your existing bath tap(s) on and turn the isolation valve to test that the water flow stops. If you do not have an isolation valve, turn the water supply off completely while you do the replacement.
- Once the water supply is turned off, begin to remove the water connection to the bath taps. If the connection is a solid pipe then you may need to cut the pipe and reattach a flexihose later on. If there’s already a flexihose then you should be able to unscrew the connection and pull it away.
- Once the water connection has been cut, unscrew the plastic nut from under the bath tap. The tap should just lift out. It’s a good idea to clean around where the old tap was before proceeding.
- Put the new bath tap in place of the old tap. Screw the plastic nut on from underneath (don’t forget the rubber seal!).
- Screw on the flexihose connectors, tighten the nuts and then turn the water supply back on.
- Turn your bath tap on to inspect for leaks! If you see no leaks then you have successfully installed your new bath tap.
That’s it! You’re all done! If you’re ready to give your bathroom a refresh, take a look at our complete range of bathroom taps. Or discover more helpful bathroom DIY guides on our blog.
*DIY can be a good way to save on bathroom installation costs. However, we would always advise that you hire a qualified professional to install our products. The above instructions are a guide to the steps involved in fitting. These instructions should not be used to attempt full installation without the necessary help or training.