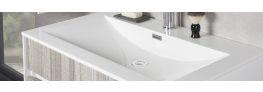


Vanity units are perhaps one of the best pieces of furniture to expand the available storage space within your bathroom. They don’t add unnecessary bulk or take away any space.
For the most part, the steps taken to install bathroom vanity units are widely unknown to anyone except for professional installers. So, wouldn’t you like to know how to install your own?
This guide will walk you through the replacement of an existing bathroom vanity unit. The installation steps are the same if you’re replacing a regular basin but you may need to adapt your plumbing slightly. If you’re unsure what to do, it’s best to call a trusted plumber to do this job for you.

What Do You Need For Bathroom Vanity Unit Installation
- Impact Drill
- Powered Screwdriver
- Holesaw Set
- Spirit level
- Suitable screws
- PPE
How To Replace A Vanity Unit
Remove An Existing Vanity Unit
First things first is removing your old vanity unit and basin.
- Isolate or turn off your water supply.
- Disconnect your basin and unit from the water pipes. There may be stagnant water in your water pipes so it’s a good idea to have a bucket to hand to catch any overspill.
- Remove the basin waste and trap from underneath your vanity unit. Follow the same step as disconnecting your pipes from the water supply and don’t forget that bucket!
- Next you need to work on removing the old basin. If it is glued or siliconed in, you may need to cut around this to free the basin. Also double check for brackets underneath before trying to remove the old basin. Once you’ve completed these steps, the old basin should simply lift off the vanity unit.
- Similarly to the basin, a vanity unit may have been caulked or siliconed to the wall to prevent water splashes so be sure to check this first and cut around this if necessary to free the cupboard. You should then be able to remove the vanity unit from the wall with ease.
- Finally, get cleared up! You want to take this opportunity to clean areas that previously may have been hard to reach. Use your blade to remove any remaining caulk or silicone from the wall.
Fitting A Vanity Unit
Next, you’re ready to fit your new bathroom vanity in place. Follow our step-by-step guide below for the best results.
- Build your vanity unit before attempting installation. However, one of the main perks of our vanity units is 99.9% of them come pre-assembled.
- The basin should just sit on top of the unit – nice and simple.
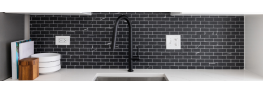
- Fit the tap with the provided nuts in the pre-cut hole in the basin.
- Remove the bottom seal and nut from the basin waste and put it in the hole. Add the rubber washer and tighten the nut. Remove the cap on the waste and hold it steady with a screwdriver, so you can tighten up the nut.
- Screw the basin waste onto the waste pipe.
Next you want to take the basin off the unit, so it can be installed. Look for the fixed waste pipe, hot and cold inlets. This is where you will need to install the vanity unit.
- Draw a line up the wall from the waste pipe – this will be your centre line.
- Measure the width of the vanity unit and find its centre. Align this with your centre line and mark the wall on either side of the vanity unit. Hold the vanity unit to the wall momentarily.
- Mark where the waste and pipe comes through at the back of the vanity unit and mark holes for the hot, cold and waste pipes.
- Drill the holes for the pipes and waste.
- Double check that the vanity unit fits against the walls with the pipes.
- Build up the waste pipe if necessary.
- Hold the vanity unit to the wall and drill 2/3 holes to keep the vanity unit in place
- Sit the basin on top of the vanity unit again and cut the excess length from the waste pipe.
- Pipe up the hot and cold taps – flexi hoses are likely the best option.
- Swap out the handles and secure the basin to the wall. Bear in mind that the glue can take up to 24 hours to fully set.
- The only thing left to do is to test for leaks and that the connections are secure. If all stays dry then you’ve successfully installed a vanity unit!
Browse our full range of vanity units or discover more handy DIY guides like this on our blog