


When it comes to upgrading your bathroom, fitting a new shower tray is a task that, with the right guidance, you can tackle as a DIY project. In this comprehensive guide, we will take you through each step of the process, from selecting the right shower tray to the final touches.

DIY Approach And Cost Savings
A well-fitted shower tray not only enhances the aesthetics of your bathroom but also ensures the functionality of your shower enclosure. A properly installed shower tray contributes to the longevity of your bathroom fittings. Embarking on a do-it-yourself (DIY) journey not only provides a sense of accomplishment but can also save you money. By understanding the intricacies of fitting a shower tray, you gain control over the renovation process.
Overview Of The Installation Steps
Before delving into the detailed steps, let's outline the key stages involved in fitting a shower tray:
- Understanding Shower Tray Types
- Gathering Materials and Tools
- Preparing the Bathroom
- Installing Adjustable Legs or Riser Kit
- Placing and Securing the Shower Tray
- Connecting Waste Pipe and Drain
- Sealing the Edges
- Final Checks and Adjustments
- Cleaning Up
- Maintenance Tips and Longevity
- Troubleshooting Common Issues
Understanding Shower Tray Types
Shower trays come in various materials such as acrylic, stone resin, and more. Understanding the characteristics of each type helps in making an informed decision based on your bathroom requirements.
- Low Profile Trays: Low profile shower trays are crafted to sit as close to the floor as possible, offering a step-free shower entry. Ideal for those seeking a ground-level shower experience or contemplating the installation of a Wet Room Shower Tray.
- Adjustable Height Shower Trays: Standing on adjustable legs, these trays provide flexibility in height adjustment, allowing easy access to underlying pipes for maintenance. Whether lowering or raising to your preferred level, these trays offer adaptability.
Gathering Materials And Tools
Before you start the installation process, gather the necessary materials:
- Shower tray
- Adjustable legs or riser kit
- Silicone sealant
- Screws and screwdriver
- Spirit level
- Drill
- Wrench
- Pencil
- Cement
- Building sand
- Mortar trowel
Understanding the purpose of each tool is essential for a smooth installation. The right tools contribute to precision and efficiency throughout the process.
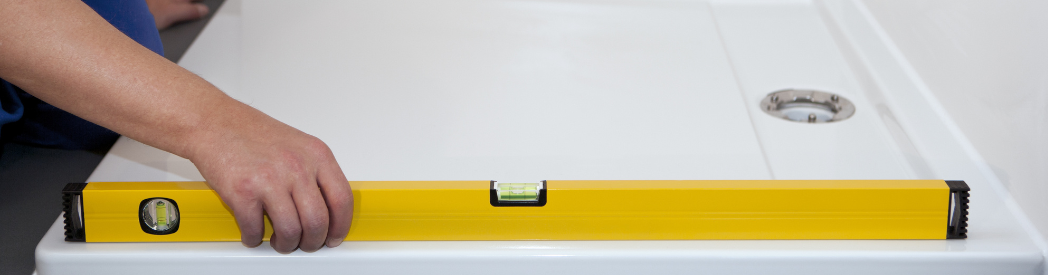
Preparing The Bathroom
- Clearing the Shower Area: Begin by removing any existing shower fittings and clearing the designated area. This ensures a clean slate for the new installation.
- Checking Floor Levelness:Use a spirit level to assess the levelness of the floor. Any unevenness should be addressed before proceeding to guarantee a stable foundation.
- Ensuring Proper Drainage: Verify that the drainage system is in good condition and properly aligned with the new shower tray. Address any issues to prevent future complications.

Installing An Adjustable Height Shower Tray, Step-By-Step
Here’s how you can fit an adjustable height shower.
1: Positioning And Leg Adjustment
- The stability of the shower tray is paramount. Place the tray in the desired location, ensuring a proper fit without clearance issues.
- Screw the legs into position and adjust the height to your preference.
- Attach the waste outlet to verify proper alignment.
2: Adjusting Riser Legs And Drainage
- Adjust riser legs to achieve a suitable fall for waste drainage (typically 50 mm fall per metre of pipework).
- Level the tray by adjusting corner legs initially, ensuring the centre leg is also fitted.
3: Connecting Waste Pipe
- Determine the optimal route from the waste trap to the waste pipe.
- Connect the outlet pipe to the trap if it's already in place.
4: Tray Placement
- Position the tray, having pre-fitted the waste's bottom part to the pipework.
5: Level It Up
- Use a spirit level to confirm the tray is entirely level. Levelness is crucial for proper drainage and avoids water accumulation.
6: All’s Well?
- Confirm all legs are engaged, and lock nuts are tightened, touching the flange.
7: Testing Drainage And Finishing Touches
- Pour water down the shower drain to check for smooth drainage without drips or leaks.
- Cover gaps around the tray with skirting boards or side panels.
- Apply a bead of sealant behind the tray, between the wall and tray, for cushioning and a primary seal against leaks.
- Fit tiles, leaving a 3mm gap between the tray and tiles. Apply sealant in this gap for a secondary seal.
9: Applying Sealant And Final Checks
- Run a bead of sealant along the top edge and wall.
- Cut side panels to length, fixing leg clamps before attaching the panel.

Installing A Low-Profile Shower Tray, Step-By-Step
1: Floor Stability
Position the shower tray and test the floor's strength. If necessary, reinforce the floor with marine plywood.
2: Access Hatch
Cut an access hatch in floorboards next to the tray for easy maintenance access.
3: Preparing For Pipework
Remove part of the floorboards to make room for pipework, as low-profile trays have limited space beneath.
4: Mortar Application
- Mix building sand and cement to create mortar. Spread a thin layer over the tray area.
- Position the tray, ensuring complete levelness. Allow drying for approximately 24 hours.
5: Connecting Waste Trap
- Use the access hatch to connect the waste trap to the outlet pipe and the outlet pipe to the waste pipe underneath the tray.
6: Sealing
- Use silicone sealant for a secure, watertight seal around the entire tray.
7. Cleaning Up
- Clean the installation area by removing any excess sealant or debris
Maintenance Tips
To maintain your shower tray post-installation:
- Regularly clean to prevent soap scum or limescale buildup.
- Use white wine vinegar and baking soda for rust marks.
- Employ mold cleaning spray to prevent mildew in the tray sealant.
For additional assistance, refer to our shower trays page featuring a range of Mira products. Your satisfactory shower experience begins with a well-fitted and maintained shower tray.
By following these comprehensive steps, your shower tiling project will result in a visually appealing, durable, and professionally finished enclosure. Take your time with each stage, and enjoy the satisfaction of a beautifully tiled shower that you accomplished yourself.
FAQs
How To Fit A Shower Tray?
Fitting a shower tray involves several steps, including preparing the bathroom, installing adjustable legs or a riser kit, placing and securing the tray, connecting waste pipes and drains, sealing edges, and conducting final checks.
How To Fit A Raised Shower Tray?
Fitting a raised shower tray follows similar steps as a standard tray installation. The key difference lies in the use of adjustable legs or a riser kit to elevate the tray to the desired height. Refer to the guide above for specific details on fitting a raised shower tray.
How To Fit A Shower Tray Waste?
Fitting a shower tray waste involves connecting the waste pipe securely and ensuring proper water drainage. Detailed instructions can be found in the section on connecting waste pipes and drains in the comprehensive guide.
How To Fix A Cracked Shower Tray?
Fixing a cracked shower tray may require professional assistance. In some cases, applying a specialised repair kit or contacting the manufacturer for guidance may be possible. Consultation with experts is recommended to address this issue effectively.
Do You Fit Shower Trays Before Wall Panels?
The sequence of fitting a shower tray and wall panels depends on the specific bathroom design. In many cases, fitting the shower tray before wall panels is recommended to ensure a secure foundation. However, individual circumstances may vary, so assess the overall plan and adjust accordingly.
How To Install A Resin Shower Tray?
Installing a resin shower tray follows similar steps to other types. The key is to choose the right resin tray for your bathroom, gather the necessary materials, and follow the comprehensive guide provided above for detailed instructions on installation.
Can You Cut A Shower Tray To Fit?
Depending on the material, some shower trays can be cut to fit specific dimensions. However, it's crucial to use the right tools, such as a fine-toothed saw or appropriate cutting equipment, to achieve a clean cut. Consult the manufacturer's guidelines for the specific tray to ensure compatibility with cutting.
Can You Fit A Shower Tray After Tiling?
While it's possible to fit a shower tray after tiling, it's generally recommended to install the tray before tiling for a seamless and watertight connection. Fitting the tray before tiling ensures a secure foundation and prevents potential issues with water leakage.
How To Install A Shower Tray On Legs?
Installing a shower tray on legs involves using adjustable legs or a specific leg kit. Follow the steps outlined in the section on installing adjustable legs or a riser kit in the comprehensive guide above for detailed instructions on installing a shower tray on legs.