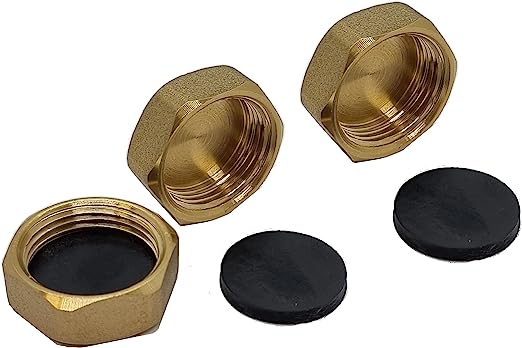
Capping off a radiator is a crucial step when removing it from the wall to avoid water leakage from your boiler onto the floors. Whether you need a temporary or permanent solution, this comprehensive guide will provide you with the necessary information. We will explore how to cap off a radiator permanently and temporarily, as well as the purposes of a radiator cap. By following these steps, you can ensure a smooth process and prevent any potential issues.
Understanding The Purposes Of A Radiator Cap
Before diving into the process, it's essential to grasp the purposes of a radiator cap. A radiator cap plays multiple roles in your heating system. Firstly, it helps maintain the cooling system pressure, which raises the boiling point of the coolant. This prevents any boil-off of coolants, ensuring efficient functioning. Furthermore, radiator caps aid in managing coolant expansion as it heats up and increases in volume. When the cooling system reaches the rated pressure, the pressure spring compresses, allowing coolant to flow into the reservoir tank. This process accommodates coolant expansion while maintaining the proper operating pressure. Sealing the cooling system is another critical function of a radiator cap. By preventing air from entering the system, it ensures a proper operating temperature and guards against overheating. Air in the cooling system can disrupt the heat exchange process and impede overall performance. Radiator caps have a vacuum valve. This valve helps coolant move from the reservoir tank to the radiator. It happens as the coolant cools down. This mechanism helps maintain the coolant level at the appropriate level, ensuring optimal functionality.
Permanently Capping Off A Radiator When Removing It
So, how to cap off a radiator permanently? It is recommended to hire a professional plumber when permanently removing a radiator. This will ensure the process goes smoothly. The steps provided here can guide you. However, it is advisable to seek the expertise of a trained plumber for altering pipework and cap installation.
-
Step 1: Turn Off Your Heating
Begin by turning off your heating system. This precautionary measure ensures your safety during the radiator removal process by preventing any potential burns. -
Step 2: Isolate the Radiator
Isolate the radiator from the rest of the system by closing the valves at each end of the unit. The first end should have a valve to control water flow, or a thermostatic radiator valve (TRV). The other end should have a valve under a plastic cap, known as the lockshield valve. Use a lockshield valve key to turn it off. -
Step 3: Drain the Radiator
Prepare a bucket or bowl to catch the water and place drip trays under each end of the radiator. Grip the valve to prevent it from bending or breaking and carefully undo the union nut attached to the pipework. Open the bleed valve using a bleed valve key to facilitate faster water drainage. -
Step 4: Loosen the Other End
Once the radiator has drained completely, proceed to loosen the union nut at the other end in the same manner. Use a spanner to grip the valve while undoing the union nut. Ensure the drip trays are in place to catch any water that may come out. Lifting the other end of the radiator can help drain any remaining water. -
Step 5: Remove the Radiator from the Wall
Now you can remove the radiator from the wall. With the assistance of another person, lift the radiator straight off and place it outside or on some old towels. Use a screwdriver to remove the brackets from the back of the radiator. -
Step 6: Capping Off the Radiator
Finally, call a professionally trained plumber to cap off the radiator and handle any necessary pipework modifications or removal. Their expertise will ensure a seamless process and eliminate any concerns regarding "dead legs" in the pipe system. Remember, a well-capped radiator will prevent water leaks and maintain the integrity of your heating system. By adhering to the steps outlined in this guide, you can successfully cap off a radiator, ensuring a hassle-free experience.
Frequently Asked Questions:
What Is A Blanking Radiator Cap?
A blanking radiator cap, also known as a blanking plug or radiator plug, is a cap designed to seal off a radiator opening. It is used when a radiator is not in use or needs to be temporarily sealed. The blanking radiator cap is typically made of metal or plastic and is threaded to fit securely into the radiator opening. It effectively blocks the flow of coolant or any other substances into or out of the radiator.

How To Cap A Radiator Pipe?
To cap a radiator pipe, turn off the system and drain any remaining water. Clean the pipe end, apply thread seal tape clockwise, and securely attach a pipe cap or plug using pliers. Avoid over tightening. Test for leaks by turning on the system.
How To Temporarily Cap Off A Radiator?
To temporarily cap off a radiator, turn off the heating system, drain the radiator, clean the pipe end, apply thread seal tape, and attach a blanking cap. Ensure a secure but not overtightened fit. This will prevent the flow of water or heat. Remember to remove the cap when you want to restore the radiator's functionality.
How To Cap Off A Radiator Without Draining The System?
To cap off a radiator without draining the entire system, start by turning off the heating. Clean the end of the radiator pipe to remove any debris. Apply thread seal tape clockwise on the pipe threads for a secure seal. Then, attach a blanking cap tightly onto the threaded end of the pipe. Ensure it is snug but not excessively tightened. This method allows you to temporarily close off the radiator without affecting the rest of the heating system. Remember to remove the cap when you want to restore the radiator's functionality and ensure proper water flow.


